How To Add New Assets in Other World Mapper
Creating and Installing Assets in Other World Mapper
The kind folk at OWM headquarters made a tutorial on how to use the in program Art Manager. You can use that for Features and Textures. But you don’t have to use it. All assets can be handled manually!
If you use Other World Mapper, which combines vector and raster artwork for a powerful cartography machine, here’s what you need to know to make and install assets.
Image File Types
OWM can use .jpgs, .pngs, and most interestingly, .svgs! That’s right, you can put vector files into Other World Mapper and access them from the Features menu and as textures! It does not currently read .webp images. Most OWM tools create vector images in the program which it styles with your added raster images. The features tool stamps raster and vector images you add to feature sets, and most other tools search for textures in your Textures folder.
Finally, OWM has the ability to load a .SHP, a shapefile made in a GIS software such as ArcGis and QGis, allowing you to style real world map data with fantasy features. Find that feature under File > Import > SVG and Shapefile.
Standards for size
By default, the grid in Other World Mapper is 100×100 pixels per inch. If using digitally this is a good size to consider for your assets. If using for print, I recommend sizes your assets at 300×300 pixels per inch and changing the grid size. However, you can always change the grid size so there are no set standards for sizing your assets unless you want them to match the existing assets.
If you are matching your assets to the frame corners, they are 75×75 squares.
If you are matching your assets to the frame borders, they are 300×75.
If you are matching your assets to the program’s default textures for battlemaps, many are 600×600. However, for print I would recommend going larger as this size will quickly look repetitive. .pngs and .jpgs both will be registered by the program but if you plan to sell your assets for DungeonDraft or Wonderdraft too, you should make them .png as those programs don’t read .jpgs. Textures should be seamless horizontal and vertically, otherwise add them to the Backgrounds folder instead and make them a huge resolution.
If you are matching your assets to the program’s feature pieces, you should know the program’s pieces range wildly depending on what kind of asset it is. The largest mountains are around 700 pixels, and the smallest rocks and trees are around 50 pixels. 20×20 is a good grass size, 20×40 is a good tree size to aim for, 300×400 is a good medium mountain size and 400×700 is a good large mountain size. The built-in scene decor typically sizes to approximately 100 pixels per foot and battlemap assets made for this program should consider that sizing.
If you make your assets in a vector program, you can add the .svg for maximum quality when upscaling and downscaling, however, if you mean to sell them in DungeonDraft or Wonderdraft formats too, you should do .png as those programs will only read .pngs.
Manually Installing Assets
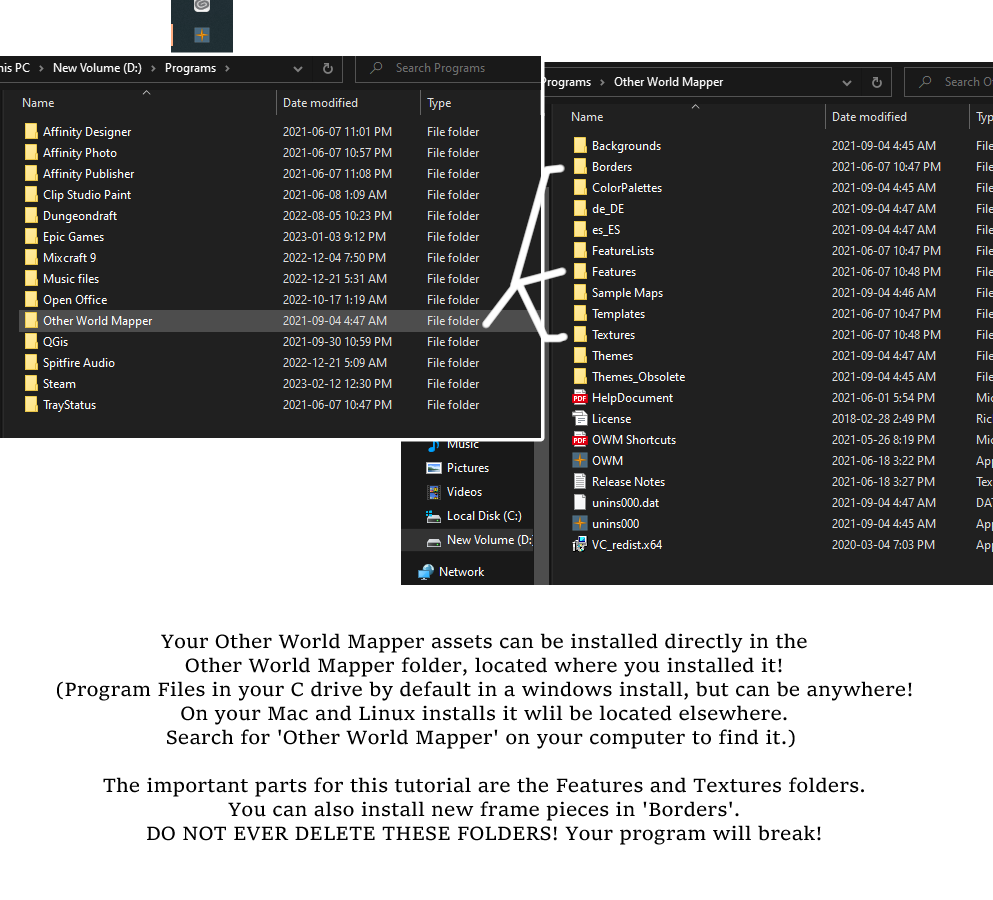
In order to place files manually you’ll need to navigate to the folder where you installed Other World Mapper. By default this is Program Files but it could be anywhere. Inside of the Other World Mapper folder you’ll find three folders where you can manually add assets: Borders, Textures and Features. Each one behaves a little different.
-
Find the Other World Mapper features folder inside of Program Files / Other World Mapper by default. It will be where you installed it. To follow this tutorial you will go to Features.
You can also add assets to Textures and Borders and Backgrounds. ColorPalettes holds text files that save color information, FeatureLists creates lists of features you made with the Image Manager, Templates and Themes hold the information for when you save a preset map design.
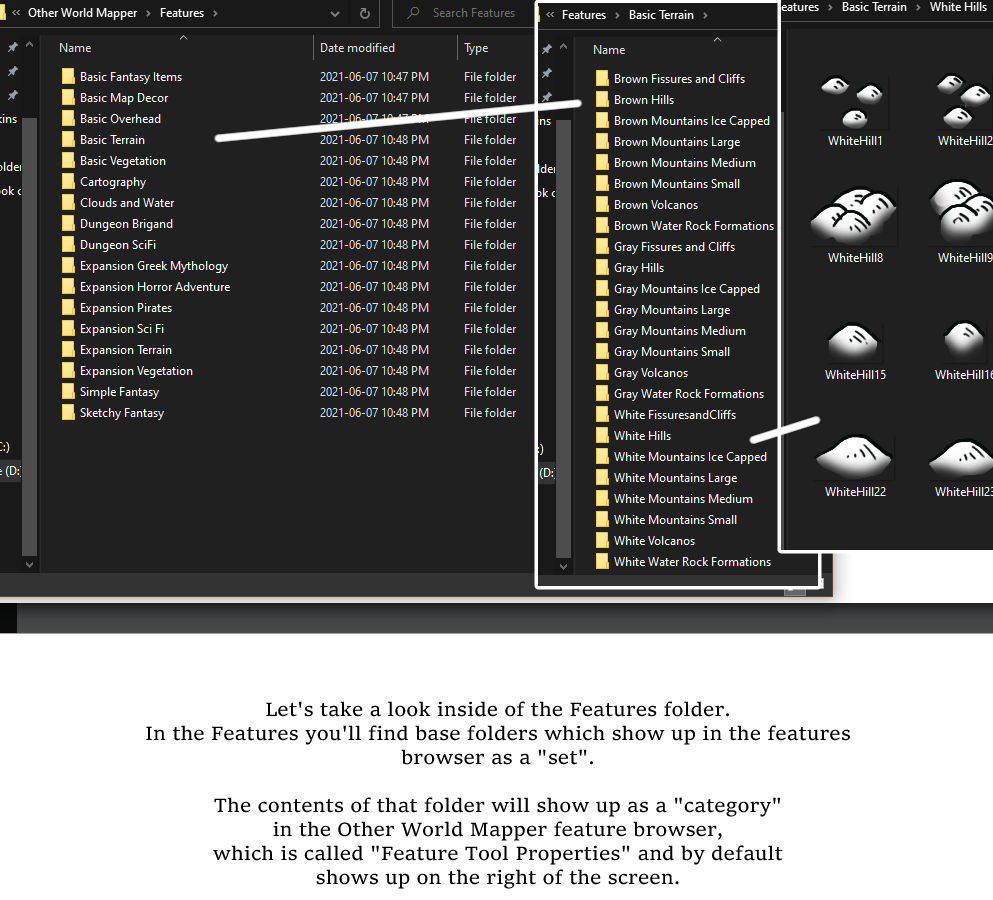
- Inside of the Features folder you will find “sets” folders. Inside of a “set” folder you will find category folders. Inside of the category folders, place your images.
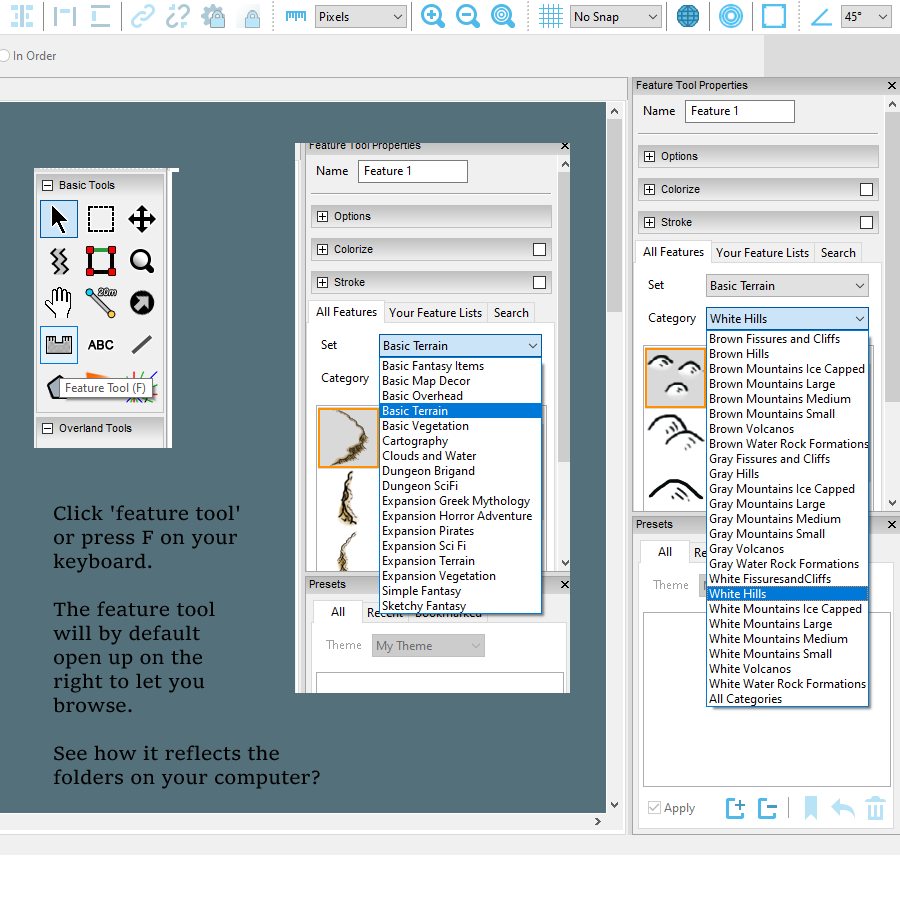
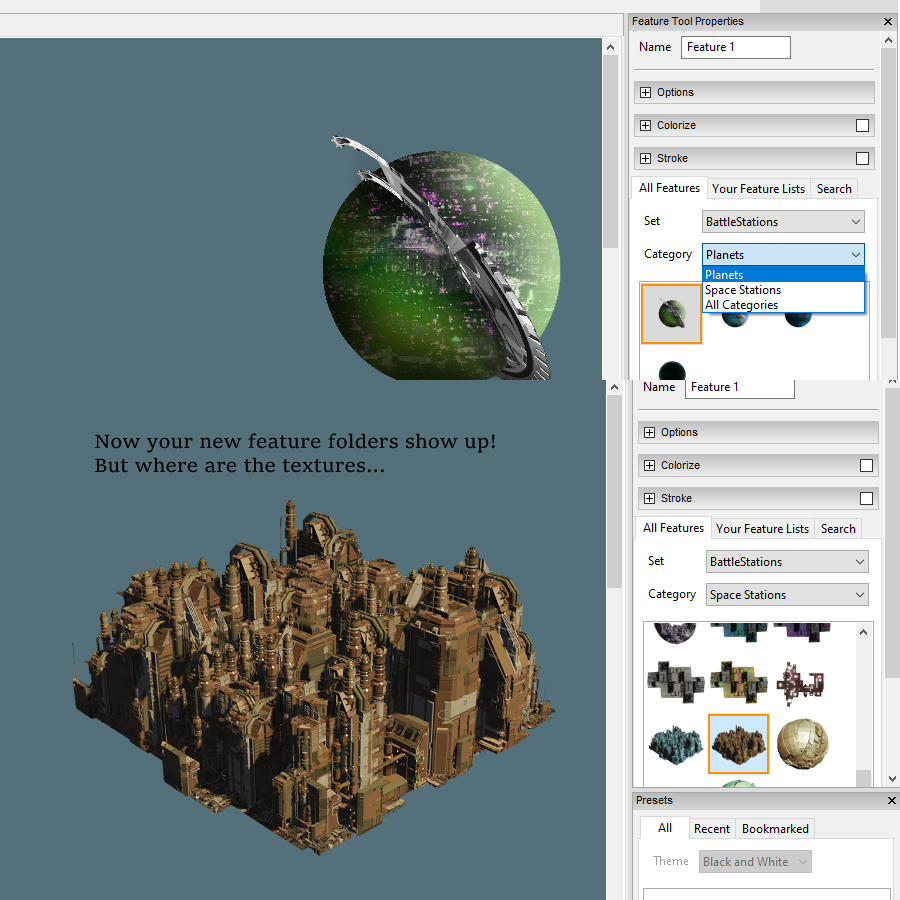
- The folders are accessed inside of the program when you access the feature tool and go into Feature Tool Properties, by default on the right side of the screen.
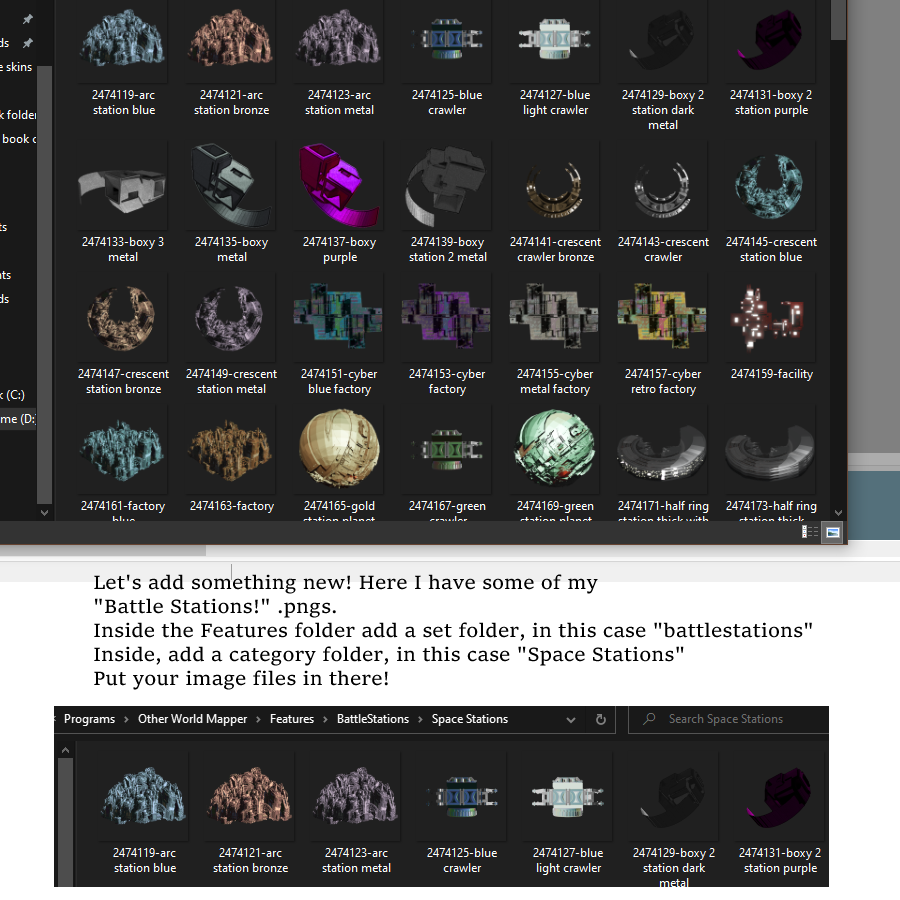
- To add something new to Other World Mapper’s feature list through the folders, add a new ‘set’ folder with your set name. In this example I am using my pack, BattleStations. Inside of that folder you can create more folders to sort the content of your pack. I created a folder called Space Stations and placed my space station .pngs in there.

- To add textures in Other World Mapper, navigate to the Textures folder.
Add a single folder with the name of your set and place the .pngs in there.

- You can also just restart the program.
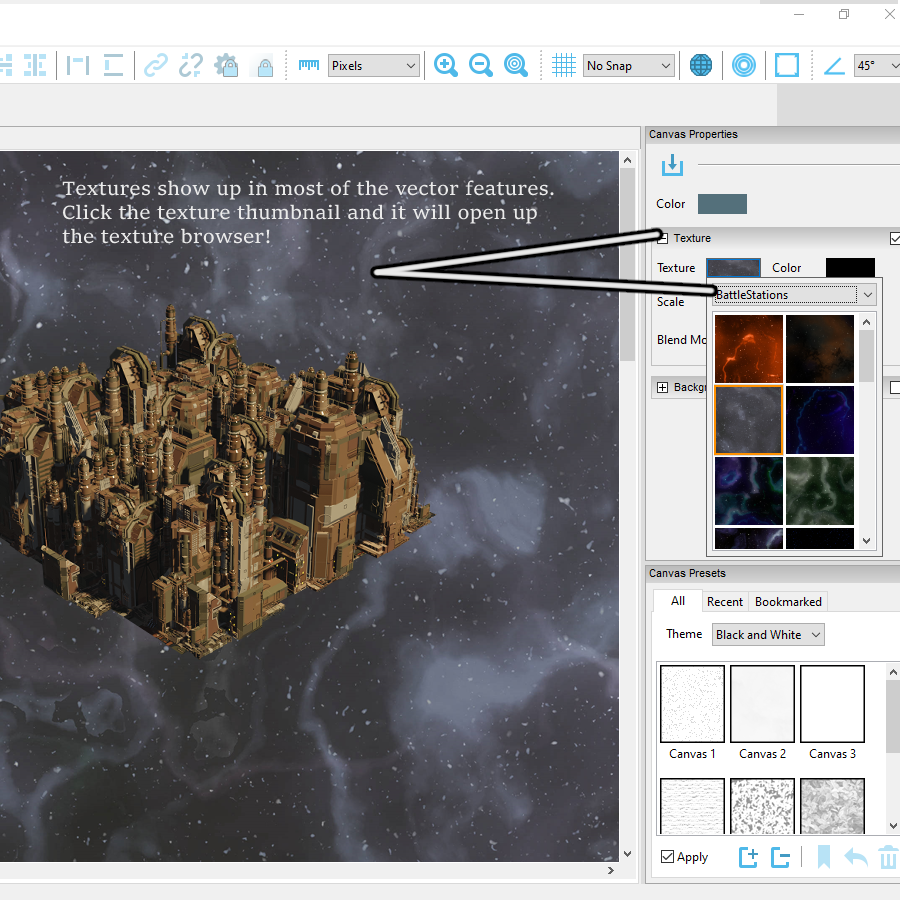
Textures will show up on several different tools. These are all the tools that can read your added texture files.
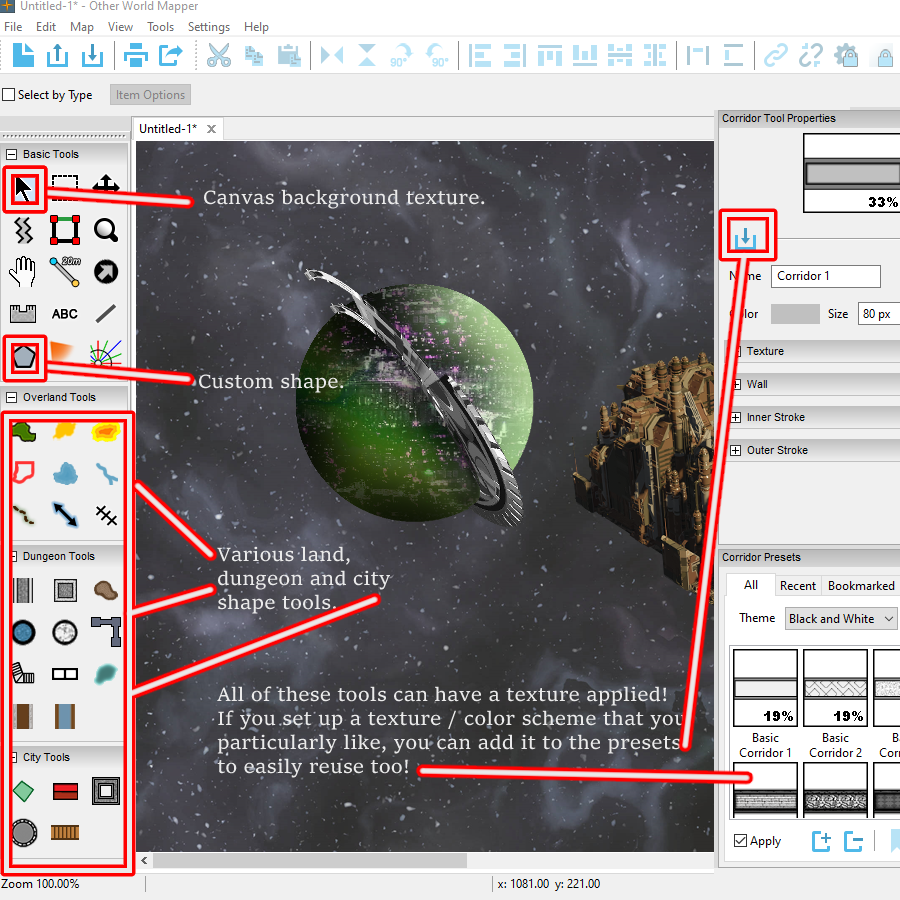
- Many tools in Other World Mapper create vector shapes which rely on added assets to make unique looks.
That leaves us with one other place you can manually add assets, and that’s the borders folder! You can’t add images to these folders through the Image Manager, you can only do it manually.
In Borders there are two folders: Frames and Corners.
In Corners, you can place any square image. By default they are 75×75 pixels.
In Frames, you can place seamless horizontally wide ribbons. This pack was originally designed to use as frames for Other World Mapper.
By default a frame ribbon should be around 300 pixels wide by 75 pixels tall.
You don’t have to adhere to these standards but that will match them to the size of the program’s assets.
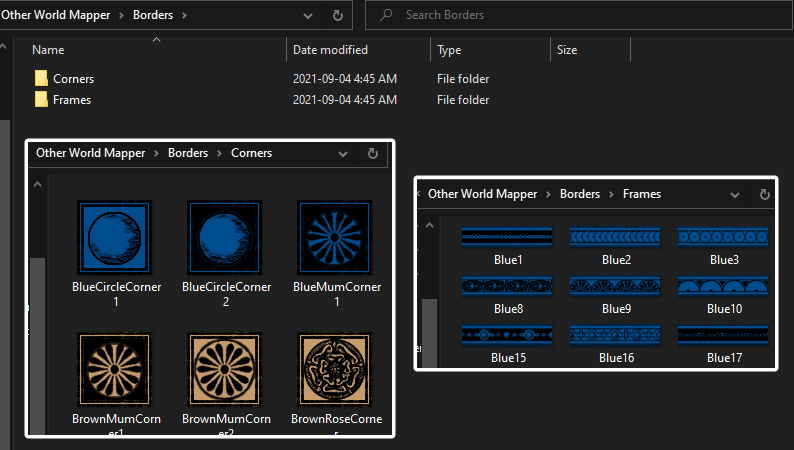
- Where to place frame corners and frame ribbons in Other World Mapper’s folders.
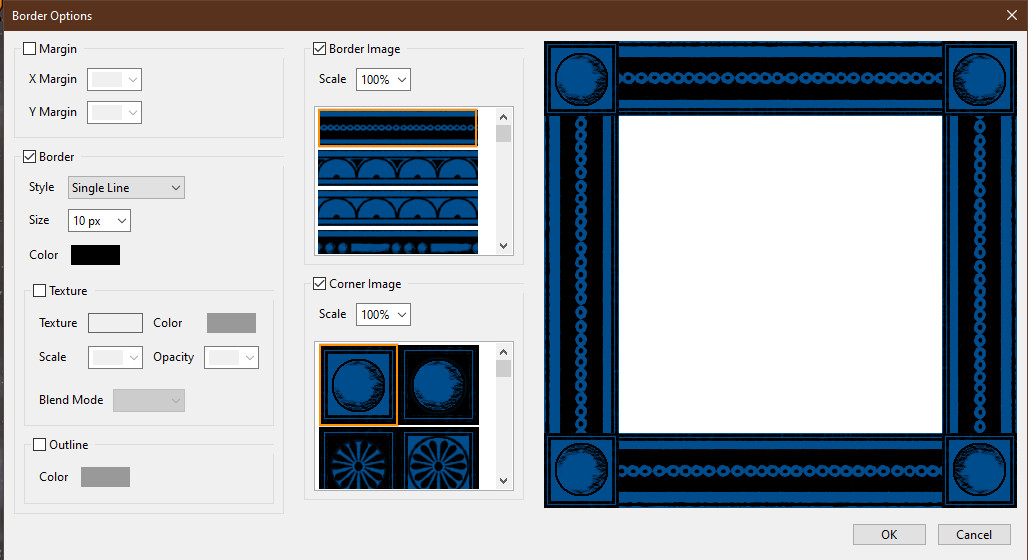
These assets will show up after you restart the program under Map > Border Options in the top menu. Just check “border image” or “corner image” to show the images available in these folders.
Hopefully that answers any questions you might have about adding custom assets to Other World Mapper manually! Many of my asset packs are suitable to add to Other World Mapper. Any with a .png image pack will be suitable. Any pack set up for use in WonderDraft with preset colors, which doesn’t rely on the Wonderdraft RGB coloring, will work in OWM. OWM does not use the RGB channels for coloring and simply allows you to apply a tint to any asset. So you will find packs like Nexoness’ Point of Interest markers with preset colors will work wonderfully.
Happy mapping!